This tutorial is on Making Your Own Card Inserts. Using the same technique you can make a wide variety of sheets. This is a very simple method which you should pick up in no time at all.

Making Your Own Card Inserts.
First of all you need to find a suitable backing paper and if necessary resize it to the size you need. We want to make an A5 card so this is an A4 sheet (from www.craftville.com) which when folded in half will give us an A5 insert.
 |
 |
Open up the backing paper you want to use and add two Guidelines. To do this you click in the ruler area and simply drag a blue guideline onto the image. Put one at the half way mark and one at the three quarter.
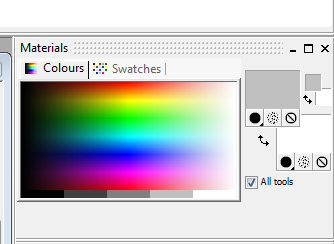
Now we need to make sure we have the correct colours selected. The colourin the lower of the two boxes will be the background colour and the one in the top box is the main frame colour.
You will also need to ensure that the solid colour (the big black dot) is selected.
Now we are going to select the shape tool on the tool bar.

Now you need to draw the shape on your image. Don’t worry if you don’t get it the right size straight away. As it is a vector you will be able to grab the sides and resize it to get it exactly to the size you want.
Obviously you wont want to go over the centre line and the middle of the shape will want to be on the three quarter line. Don’t worry the shape will always remain symetrical so you don’t have to worry about that.
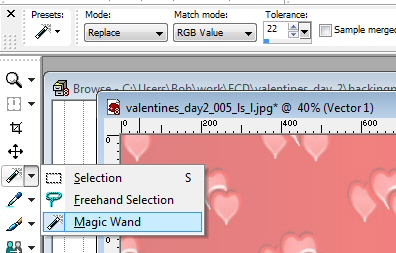
Next we will need the “Magic Wand” select tool. Make sure the tools options are set roughly as they are in our picture.
 |
 |
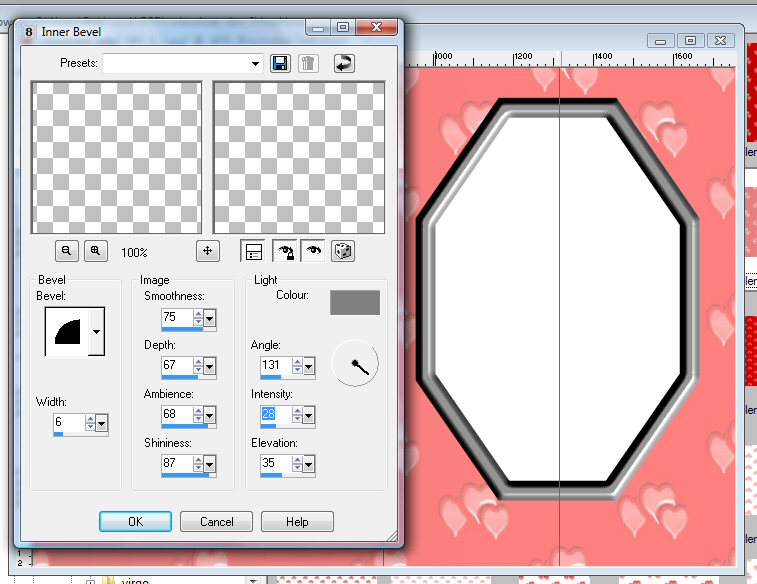
Use the Magic Wand to select the border on the shape you have created. Once you have selected it you will be able to alter it using the Inner Bevel option. You will find this by selecting Effects / 3D Effects / Inner Bevel…….
You can select the options as we have or you can have a play around with them and see what different effects you can come up with. You can use the “eye” to preview what you image will look like at any time. When you are happy with the setting the just click OK.

We hope you enjoy Making Your Own Card Inserts and find it useful.
Authored By: Bob Prentice.

