

This is the second part of of course which covers Rotation Resizing and Plugins. Slightly shorter video than the first one and also more practical. We obviously assume you now have Paint.net installed on your computer. If you use a different graphics program then some of the techniques shown may be similar depending on what effects your program has available.
This part of the course is spread over two pages so please don’t miss the 2nd!
Rotation Resizing and Plugins.
Both the video and the following information is split into three main parts:
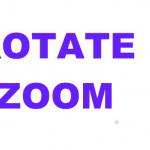
- Rotate and Zoom. This section uses an example ot a topper to demonstrate the technique.
- Crop, Resize and Canvas Size.
- Plugins. How to install plugins and a first look at a couple which are useful to crafters.
At the end of the 2nd page you will find a link to files/images mentioned and used in this video.
[N.B. This video is a couple of year old. Whilst it says Paint.net is in the process of changing from version 3 to version 4 you should know that version 4 is now the established version. Version 3 is no longer supported. The basic information on Rotation Resizing and Plugins remains the same.]
Rotation Resizing and Plugins: Video.

Rotate/Zoom.
The Rotate/Zoom tool can be found under the Layers Menu. In the video we have used this at the end of a project on the words Happy Birthday. We aren’t going to replicate the project here but just give you a little information about the tool. The Roll/Rotate and the Pan both have 3 ways of altering them each. The Zoom has two.

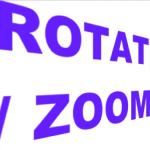

Don’t think it is only words you can use this on. It can also be use on any other type of image. Best used when the background is transparent or a single colour but trying it on photos etc. can have an interesting effect especially if you use the Tiling and Preserve Background options.
As with all of these effects the best thing to do is have a play.
Crop, Resize and Canvas Size.
Cropping.
Cropping to a selection is quite easy. First of all you need to select the area you want using the selection tools and the move selection arrow from the toolbar. Once you have it right just click on the “Crop to Selection” button on the menu bar. Keep an eye on the bottom bar, it gives you lots of information. Some of the information it gives changes according to the tool you have selected. The image above show the layout when a selection tool has been selected. You can change units at any time from a choice of “cm”, “inch” and “pix” without affecting the image.

Resizing.
Next we look at resizing an image. You will find this option under “Image” on the main menu.
If you have an image like our example, when resizing, you will need to keep the proportions of the width to height the same, otherwise the image will be distorted. In order to do this you should have “Maintain aspect ratio” boxed tick. With this, if you put in a width, it will work out the height for you. If you put in the height, it will work out the width. This applies irrespective of whether you choose to work in pixels or inches/cm.

Here is a little trick for changing an A4 sheet to an A5 one (or A5 to A6 or A6 to A7). Open the resize window and choose to work in either pixels or inches/cm. Now replace the larger number with the smaller one. It’s as simple as that.
Obviously if you want to purposefully distort the image and select both height and width yourself the you will need to un-tick the “Maintain aspect ratio” box.

Changing the Canvas size.
Changing the canvas size is just like taking a craft knife and ruler to your picture and cutting the side of. It doesn’t suit a lot of images because you will lose parts you need but there are times it is useful. I use it a lot for backing papers with repeated designs, when I want the sheet to be smaller but don’t want to shrink the design or a want a different proportioned sheet.
You will notice to box on the bottom right of the Canvas Size window (under Image on the main menu), give you 9 choices of where to cut from.


