
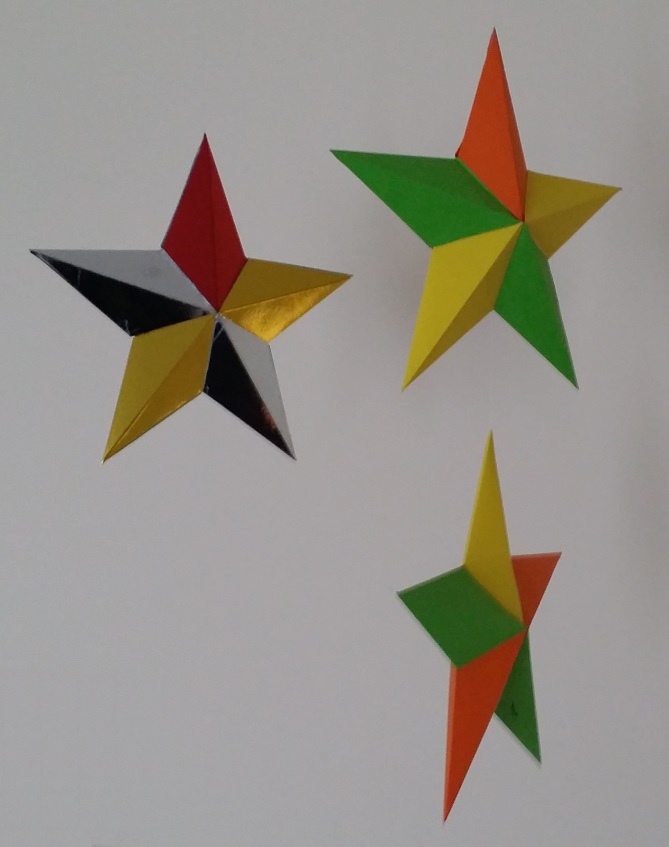
This 3d Christmas star can be used either as a hanging decoration or as a star for the top of your Christmas tree. A great project for both adults and children. For very young children you could make the star yourself and let them decorate it. If you are doing this we suggest you use thin carboard rather than paper as this makes the star more robust!
As with our last project, the flat backed star, there are multiple ways this can be decorated. You can use white card (or paper) and then paint it. (paper may not take the wet paint). You can use coloured papers and then add gltter etc or you can even used metallic card as we do in the video.
Things you will need to make the 3d Christmas Star.
- At least two sheets of paper or card (3 for the large start). Colours etc. depend on your design.
- Glue capable of sticking the card/paper.
- One paper clip for the hanger (if you want one) and several to use during gluing up.
- The template downloaded off the site.
- Paint, glitter, shapes etc. depending on how you choose to decorate the star.
- Blunt knife for scoring.
- Cotton for hanger (if required).


Instructions for making the 3d Christmas Star.
- Use one of the templates to print onto your card (obviously the back if you are using metallic card or suck like). You will need to print enough so you have 5 separate “prongs”. (Normally 3 sheets for the large star and 2 for the smaller one although you may need to do more if you want to mix the colours up).
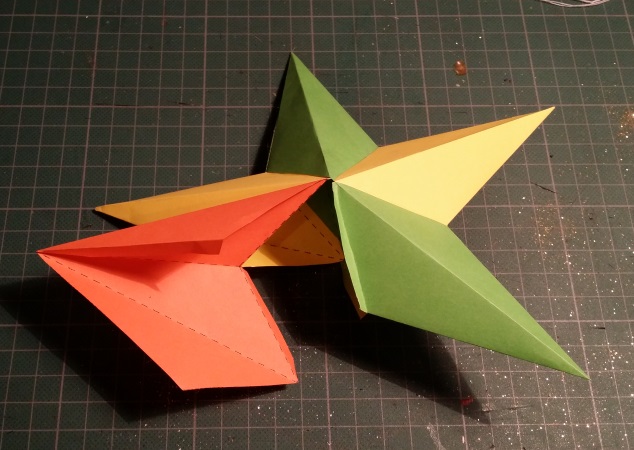
- Cut the prongs out. (Fig.1.)
- Score each of the dotted lines.
- Fold each of the lined. The longer liner need to be valley folds and the two short tabs need to be folded back gently (about 45 degrees). (Fig.2.)
- Glue up the long tab so it goes under it’s opposite side. ONLY DO THIS TO 4 OF THE PRONGS. Leave the pro you wish to go at the top unglued. (Fig.3.)
- Take two prongs you wish to be next to each other. Glue up so the two sides with tabs on one prong are glued to the two sides without tabs on the other prongs. The tab should be glued so the go inside. (Fig.4.)
- Repeat this two more times so you have joined 4 of the prongs together. (Fig.5.)
- Take the 5 prong (the unglued one) and glue its’ two tabs to you main part (there should only be two sides left without tabs where it can go).
- Make a hanger out of a loop of cotton and put a paperclip on it.
- Lay the hanger so the paperclip goes inside the last prong and the cotton comes out of the very top.
- Glue up the last to tabs and then the long tab on the last prong. (Fig.6.)
- The star should now be ready to decorate as you wish.

[If this all seems a little complicated please believe me that it isn’t. When you have the pieces in front of you it is all rather obvious. The video shows it much clearer than I can explain here!]

We really hope you enjoy making this 3d Christmas Star project. Don’t forget, if you have young children you can make the star in white cardboard and then let them decorate it. Just think how proud they will feel to see their own star on top of the Christmas tree!
As normal the 3d Christmas Star templates are available to download for free (links above). There are two different sizes available but the process for making each is exactly the same.

Thank you for the delightful 3D star. It’s a winner!
I’ve enjoyed making them. I’m now making lots of little silver and gold discs with the cut off metallic card and a hole punch!
I have just been to Home Bargains and now I’m all set to make some of these lovely stars.:-)
Glad you managed to get the metallic sheets. Definitely too good a bargain to pass up 🙂